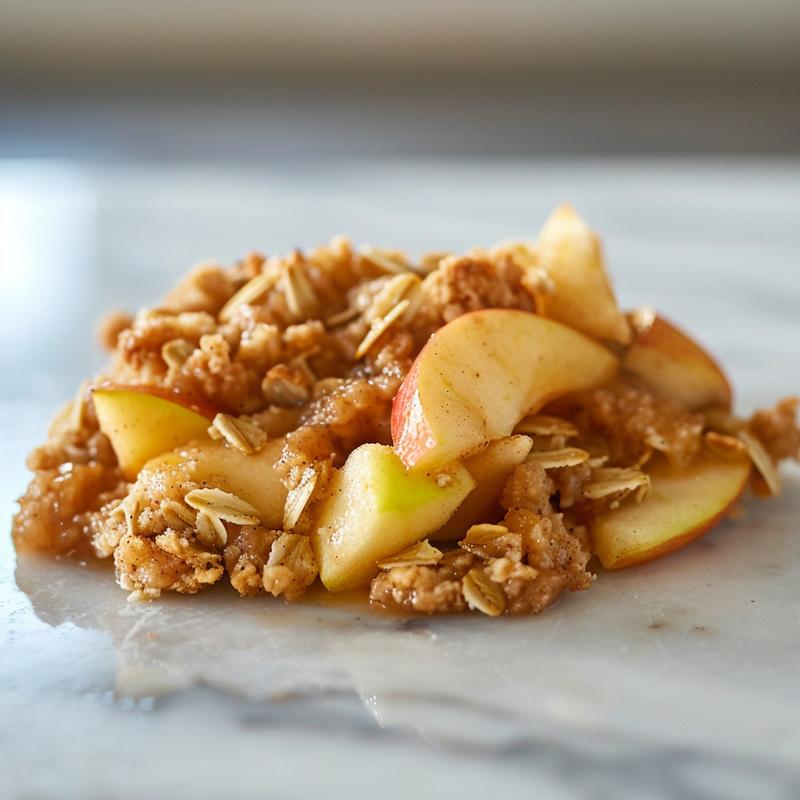
Unleash the Magic of Apple Crisp: A Dessert Worth Sharing
If there’s anything that brings joy to a fall gathering, it’s the aroma of a freshly baked apple crisp wafting through the air. This beloved dessert combines the sweetness of apples with a crunchy, buttery topping that’s simply irresistible. In this guide, we’re diving into the ultimate apple crisp topping recipe that will elevate your dessert game to legendary status. Whether it’s a cozy family dinner or a festive holiday gathering, this apple crisp recipe is your ticket to culinary fame!
Let’s explore why this recipe is not just another dessert, but a delightful experience that you can’t wait to share!
Why You’ll Love This Recipe
- Perfect balance of flavors: The tartness of Granny Smith apples beautifully complements the sweetness of brown sugar and warm spices.
- Easy to make: With straightforward steps, you’ll whip up this delicious treat in no time, perfect for busy schedules!
- Customizable ingredients: You can easily swap out ingredients to suit dietary needs or personal preferences, making it versatile for everyone!
- Makes your kitchen smell divine: The combination of cinnamon and baked apples will have your friends and family asking, “What’s cooking?”
- Perfect for any occasion: Whether it’s a casual weeknight or a festive gathering, this apple crisp is always a hit!
Ingredient Breakdown
Let’s get into the heart of this apple crisp, starting with the ingredients that make it shine. Here’s what you’ll need:
- 1 cup (125g) all-purpose flour: Provides the structure for the topping. You can substitute with gluten-free flour if needed.
- 1/2 cup (100g) granulated sugar: Sweetens the base layer of the crisp.
- 1/2 cup (115g) unsalted butter: Cold and cubed, this adds the flaky texture we crave.
- 1/4 teaspoon salt: Enhances the sweetness of the dish.
- 4 medium apples (about 600g): I recommend using Granny Smith for their tartness, but feel free to mix in Honeycrisp or Fuji for extra flavor.
- 1/3 cup (65g) brown sugar: Adds caramel notes to the apple filling.
- 1 tablespoon (15ml) lemon juice: Keeps the apples fresh and brightens the flavor.
- 1 teaspoon ground cinnamon: A classic pairing with apples, it warms the palate.
- 1 tablespoon (8g) cornstarch: Thickens the juices of the apple filling.
- 3/4 cup (90g) all-purpose flour: For the crisp topping, it adds texture.
- 1/2 cup (45g) rolled oats: Provides that classic crisp texture.
- 1/3 cup (65g) brown sugar: Sweetness for the topping.
- 1/2 teaspoon ground cinnamon: For added warmth in the topping.
- 1/2 cup (115g) unsalted butter: Cold and cubed, to ensure a crumbly topping.
Step-by-Step Instructions
Ready to make your apple crisp? Follow these easy steps for a flawless dessert:
- Step 1: Preheat and Prep – First things first, crank your oven to 350°F (175°C) and line an 8×8-inch baking pan with parchment paper.
- Step 2: Make the Base – In a medium bowl, mix the flour, sugar, and salt for the base. Cut in the cold butter with a pastry cutter or your fingers until it looks like coarse crumbs. Press this mixture into the bottom of your pan and bake for 15 minutes until it’s just starting to turn golden.
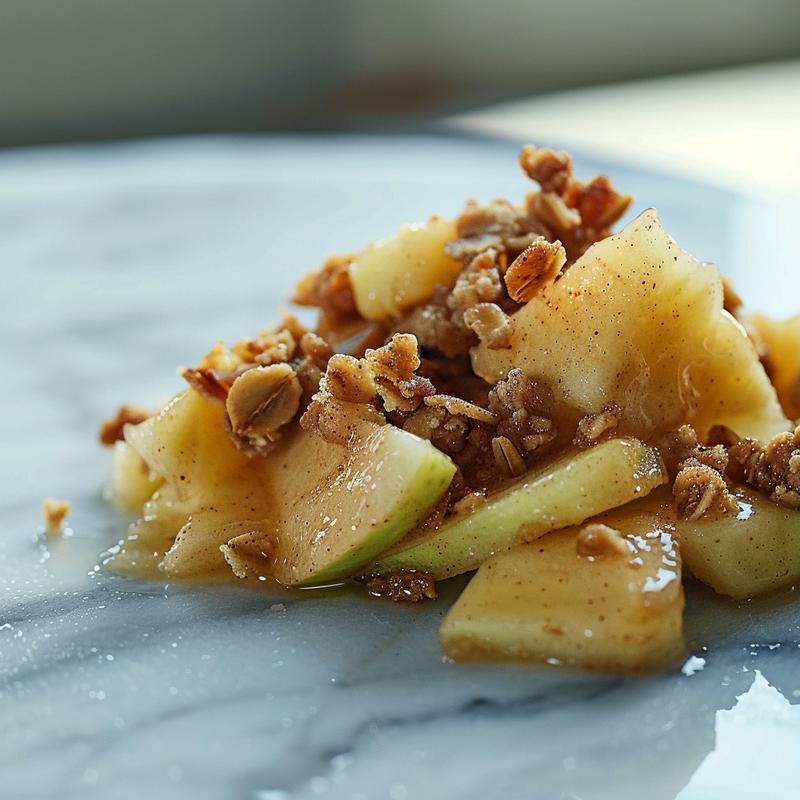
- Step 3: Prepare the Apple Filling – While the base bakes, toss your diced apples with brown sugar, lemon juice, cinnamon, and cornstarch. Spread this mixture over the pre-baked base once it’s out of the oven.
- Step 4: Whip Up the Crisp Topping – For the topping, combine flour, oats, brown sugar, and cinnamon in a bowl. Cut in the cold butter until you’ve got pea-sized crumbs. Sprinkle this evenly over the apple layer.
- Step 5: Bake to Perfection – Pop the whole thing back in the oven for about 25-30 minutes, or until the top is golden and the apples are bubbly.
- Step 6: Cool and Slice – Let the pan cool on a wire rack for at least 30 minutes before slicing into bars.
Pro Tips for the Perfect Apple Crisp
- Mix apple varieties: Combining tart and sweet apples creates a more complex flavor profile.
- Chill the butter: Keeping the butter cold until you mix it in ensures a flakier topping.
- Don’t overmix: When combining the crisp topping, mix until just combined to prevent a dense texture.
- Experiment with spices: Feel free to add nutmeg or ginger for a unique twist.
- Use a glass dish: Baking in glass helps you monitor the browning and bubbling of your crisp.
- Serve warm: A warm apple crisp with a scoop of vanilla ice cream is the ultimate treat!
- Let it rest: Allowing the crisp to cool for a bit helps it set and makes slicing easier.
- Double the recipe: For larger gatherings, you can easily double the ingredients and use a larger dish.
- Store leftovers properly: Refrigerate in an airtight container for up to 5 days.
- Reheat thoughtfully: Warm in the oven or microwave before serving to bring back its delightful texture.
Common Mistakes & Troubleshooting
Even the best chefs encounter hiccups! Here are some common mistakes to avoid:
- Overbaking: Keep an eye on your crisp; you want the topping golden, not burnt!
- Too much liquid: If your apple filling is too watery, add more cornstarch next time.
- Not enough flavor: Don’t skimp on spices—cinnamon and brown sugar are key!
- Using mushy apples: Stick with firm apple varieties to avoid a soggy mess.
Recipe Variations
Spice things up with these delicious variations:
- Vegan Apple Crisp: Substitute butter with coconut oil and use maple syrup instead of granulated sugar.
- Gluten-Free Apple Crisp: Replace all-purpose flour with a gluten-free flour blend and oats.
- Nutty Topping: Add chopped walnuts or pecans to the crisp topping for extra crunch.
- Berry Apple Crisp: Mix in raspberries or blueberries with the apple filling for a fruity twist.
Storage and Make-Ahead Instructions
Want to prepare your apple crisp ahead of time? Here’s how to store and make it last:
- Refrigerate: Store cooled apple crisp in an airtight container in the fridge for up to 5 days.
- Freezing: You can freeze unbaked crisp for up to 3 months. Just bake from frozen, adding a few extra minutes to the baking time.
- Make-ahead assembly: Assemble the apple crisp and refrigerate it before baking. Bake when you’re ready for a fresh dessert.
Comprehensive FAQ
- Can I use other fruits? Absolutely! Pears, peaches, or mixed berries can replace apples for different flavors.
- What’s the best way to peel apples? A vegetable peeler or a paring knife works best. Just be careful!
- Can I use frozen apples? Yes, but thaw and drain excess liquid before using them.
- Do I need to pre-cook the apples? No, they’ll cook perfectly in the oven with the crisp topping.
- How do I know when it’s done? Look for a golden topping and bubbly filling—your kitchen will smell amazing!
- Can I add nuts to the filling? Yes! Chopped nuts can add a delightful crunch to the apple filling.
- What’s the best way to serve apple crisp? Serve warm with a scoop of vanilla ice cream or whipped cream for the ultimate experience!
- Is apple crisp gluten-free? It can be! Just make sure to use gluten-free flour and oats.
Nutrition Tips and Dietary Adaptations
This apple crisp is not only delicious but can be adapted to fit various dietary needs:
- Low-sugar option: Use a sugar substitute to reduce the sweetness.
- High-fiber twist: Add chia seeds to the filling for an extra fiber boost!
- Nut-free option: Omit nuts in the topping or filling if allergies are a concern.
Essential Equipment for Success
To create this apple crisp masterpiece, you’ll need:
- 8×8-inch baking pan: A must-have for even baking.
- Mixing bowls: Essential for combining your ingredients effortlessly.
- Pastry cutter or fork: For cutting in butter to achieve that perfect crumbly topping.
- Measuring cups and spoons: Accurate measurements are key to baking success!
Serving Suggestions
Ready to serve your apple crisp? Here are my favorite ways to enjoy it:
- A la mode: Serve warm with a scoop of vanilla ice cream on top.
- With whipped cream: A dollop of whipped cream adds a luxurious touch.
- Pair with coffee: Enjoy a slice with your morning brew for a sweet start to the day.
- Garnish with mint: A sprig of mint makes for an elegant presentation.
In conclusion, this apple crisp is more than just a dessert—it’s a celebration of flavors and textures that everyone will love. With its simple preparation and endless customization possibilities, you’ll find yourself making this recipe time and time again. So grab your apron, preheat that oven, and let’s get baking! Don’t forget to share your creations with friends and family—after all, great food is meant to be shared!

Apple Crisp Topping – The Secret to a Perfect Crisp
Ingredients
Method
- Preheat oven to 350°F (175°C) and line an 8×8-inch pan with parchment.
- Mix flour, sugar, and salt; cut in cold butter until crumbly. Bake for 15 minutes.
- Toss diced apples with brown sugar, lemon juice, cinnamon, and cornstarch. Spread over baked base.
- Combine flour, oats, brown sugar, and cinnamon; cut in cold butter until crumbly. Sprinkle over apples.
- Bake for 25-30 minutes until golden and bubbly. Cool before slicing.
Notes
Loved this recipe? Save it to your favorite Pinterest board so you can easily find it later! ✨