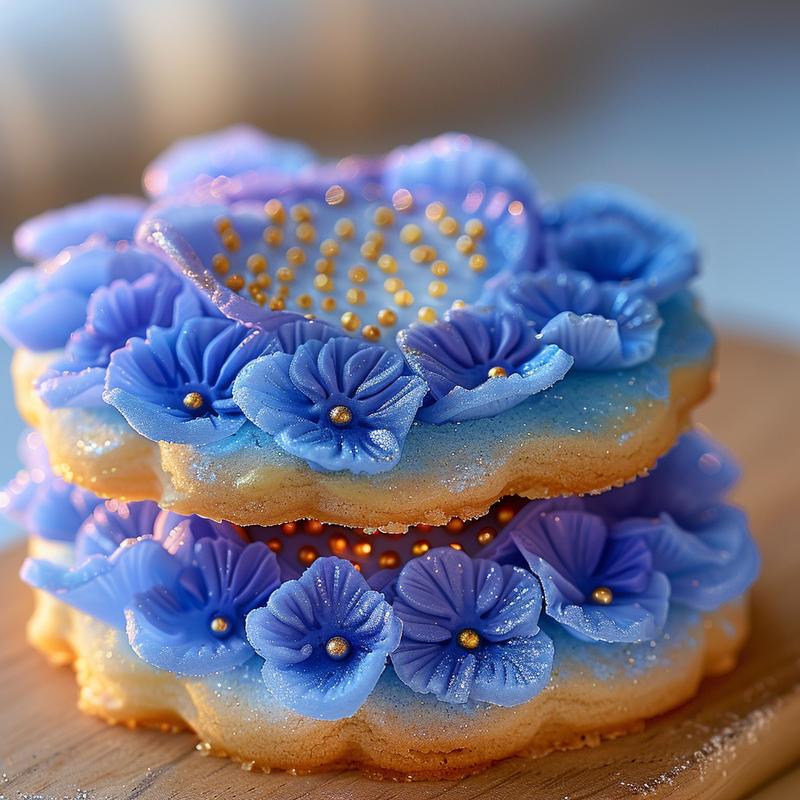
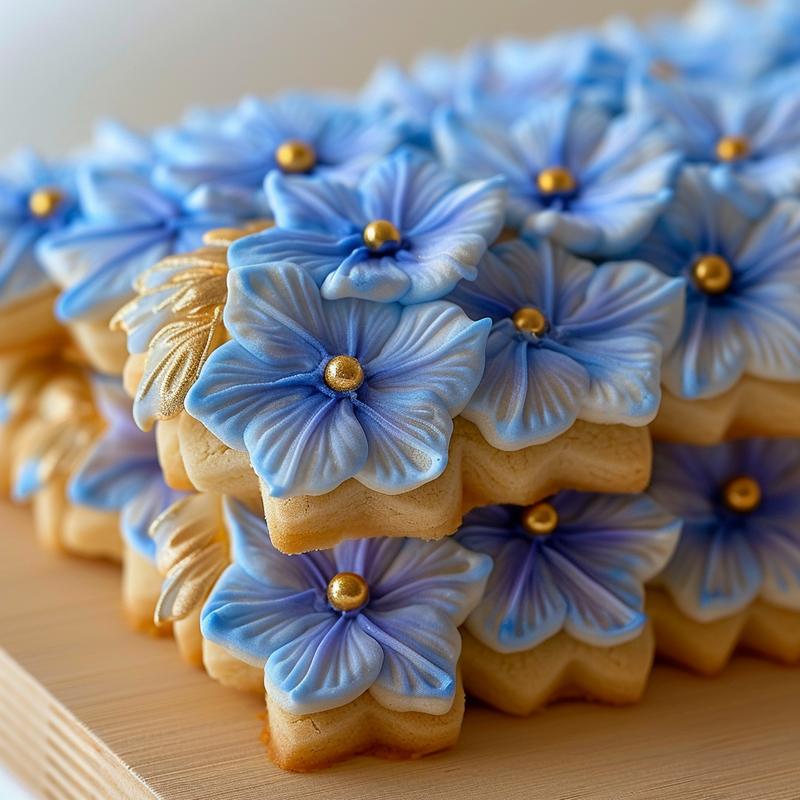
Blue and Gold Hydrangea Sugar Cookie Design Tutorial: Let’s Get Creative!
Hey, cookie creators! Louis here, and I’m about to show you how to turn ordinary sugar cookies into edible masterpieces. If you’re looking to seriously impress at your next party or just want to level up your baking game, you’ve come to the right place. These Blue and Gold Hydrangea Sugar Cookies aren’t just delicious; they’re a work of art. So, grab your piping bags, and let’s get started!
This design is perfect for baby showers, weddings, or any occasion that calls for a touch of elegance. The blend of soft blues and shimmering gold makes these cookies absolutely irresistible. I used this technique for a friend’s bridal shower, and they were a HUGE hit! Trust me; everyone will be asking for your secret.
Why You’ll Love This Design
- Stunning Visuals: The hydrangea design is incredibly eye-catching.
- Relatively Easy: Despite looking complex, this design is beginner-friendly.
- Customizable: Play with different colors to match any event.
- Delicious: It’s not just about looks; these cookies taste amazing too!
- Shareable: Perfect for showing off on your social media. #CookieArt #HydrangeaCookies #BakingGoals
I’m all about making baking fun and accessible. This tutorial breaks down each step, so you’ll feel confident creating these beauties, even if you’re a newbie. Check out the simple steps below!
Ingredients You’ll Need
- Sugar Cookies: Use your favorite sugar cookie recipe. Make sure they are completely cooled.
- Buttercream Frosting: I recommend a stiff buttercream for piping.
- Wilton 1M Piping Tip: This is essential for creating the hydrangea petals.
- Piping Bag: For easy frosting application.
- Edible Gold Pearls: To add a touch of elegance to the center of each flower.
- Americolor Violet & Sky Blue Gel Food Coloring: For creating the perfect hydrangea blue.
A few high-quality ingredients and the right tools can make all the difference. I’m telling you, once you see how easy it is, you’ll be hooked!
Step-by-Step Tutorial: Creating Your Hydrangea Cookies
Alright, let’s dive into the fun part! Here’s how to bring these Blue and Gold Hydrangea Sugar Cookies to life:
- Prepare Your Frosting: Divide your buttercream into two bowls. Add Americolor Sky Blue to one bowl and Americolor Violet to the other. Mix well until you achieve your desired shades of blue. I often find that a combination of the two creates a beautiful french blue.
- Fill Your Piping Bag: Fit your piping bag with the Wilton 1M tip and fill it with one of your blue buttercreams.
- Pipe the Edge: Begin piping dollops all the way around the edge of your cookie. Apply pressure and slightly spin as you release to create this petal shape.
- Fill the Center: Once you have your rim of dollops, fill in the center with 2 or 3 more dollops to add dimension.
- Add the Gold Pearl: Place one edible gold pearl in the center of each flower dollop.
- Repeat: Repeat steps 2-5 with the other shade of blue buttercream, alternating colors for a more dynamic look.
- Let Them Set: Allow the buttercream to set for at least 30 minutes before handling.
See? I told you it was easy! If you follow these steps, you’ll have gorgeous hydrangea cookies in no time. I’m already imagining all the compliments you’re going to get!
Pro Tips for Perfect Hydrangea Cookies
- Stiff Buttercream is Key: Make sure your buttercream is stiff enough to hold its shape. If it’s too soft, the petals will droop.
- Practice Makes Perfect: Practice piping on a piece of parchment paper before decorating your cookies.
- Even Pressure: Maintain even pressure on the piping bag for consistent petal size.
- Chill Your Cookies: Chilling your cookies before decorating can prevent the buttercream from melting.
- Use a Palette Knife: If you mess up a petal, use a palette knife to gently remove the buttercream and start over.
I always say, a little bit of practice goes a long way. Don’t be afraid to experiment and find what works best for you. Your cookie decorating will improve with time!
Common Mistakes to Avoid
- Overmixing Buttercream: Overmixing can incorporate too much air, making it difficult to pipe.
- Using Warm Cookies: Always make sure your cookies are completely cool before decorating.
- Inconsistent Piping Pressure: This can lead to uneven petal sizes.
- Ignoring Buttercream Consistency: If your buttercream is too soft, add a little powdered sugar. If it’s too stiff, add a drop of milk.
Everyone makes mistakes, even I do! The key is to learn from them and keep practicing. You’ll get there!
Variations and Creative Twists
- Different Colors: Experiment with different shades of blue, pink, purple, or even white for a different look.
- Edible Glitter: Add a sprinkle of edible glitter for extra sparkle.
- Different Piping Tips: Try using a different piping tip for a unique petal shape.
- Flavor Variations: Add a touch of lemon or almond extract to your buttercream for a flavor boost.
- Cookie Cake: Use this technique to decorate a large sugar cookie cake for a show-stopping dessert.
The possibilities are endless! Let your creativity run wild and make these cookies your own. I’m always excited to see what you come up with!
How to Store Your Decorated Sugar Cookies
To keep your beautiful cookies fresh, follow these tips:
- Airtight Container: Store your cookies in an airtight container at room temperature.
- Layering: If stacking cookies, place a piece of parchment paper between each layer.
- Avoid Humidity: Keep your cookies away from humid environments to prevent the buttercream from softening.
- Short-Term Storage: Decorated sugar cookies are best enjoyed within 3-5 days.
Proper storage is crucial to maintain the taste and appearance of your cookies. Trust me, you want them to look as good as they taste!
Frequently Asked Questions (FAQ)
- Can I use a different type of frosting?: While buttercream is recommended for its stability, you can experiment with other frostings. Just make sure they are stiff enough to hold their shape.
- Can I make these cookies ahead of time?: Yes! You can bake the cookies and make the buttercream a day or two in advance. Just store them separately until you’re ready to decorate.
- Where can I find edible gold pearls?: You can find edible gold pearls at most craft stores or online retailers that sell baking supplies.
- What if my buttercream is too soft?: Add powdered sugar, one tablespoon at a time, until it reaches the desired consistency.
- Can I freeze these cookies?: It’s not recommended to freeze decorated sugar cookies as the buttercream may change texture.
Got more questions? Feel free to ask! I’m always here to help you on your baking journey.
Serving Suggestions: Make Every Bite Special
These cookies are perfect on their own, but here are some ideas to elevate your presentation:
- Elegant Platter: Arrange your cookies on an elegant platter for a stunning display.
- Gift Giving: Package them in a beautiful box or bag for a thoughtful gift.
- Dessert Table: Incorporate them into a dessert table at your next party or event.
- With Tea or Coffee: Serve them with a cup of tea or coffee for a delightful treat.
No matter how you choose to serve them, these Blue and Gold Hydrangea Sugar Cookies are sure to impress. I’m so excited for you to try this design and share your creations with the world!
I’m Louis, and I hope this tutorial inspires you to get creative in the kitchen. Remember, baking is all about having fun and sharing your passion with others. Now, go out there and make some magic! Don’t forget to tag me in your cookie creations – I can’t wait to see them!

Blue and Gold Hydrangea Sugar Cookie Design
Ingredients
Method
- Begin piping dollops around the edge of your cookie.
- Apply pressure, and slightly spin as you release to create the petal shape.
- Fill in the center with 2 or 3 more dollops.
- Place one edible gold pearl in the center of each flower.
Notes
Loved this recipe? Save it to your favorite Pinterest board so you can easily find it later! ✨