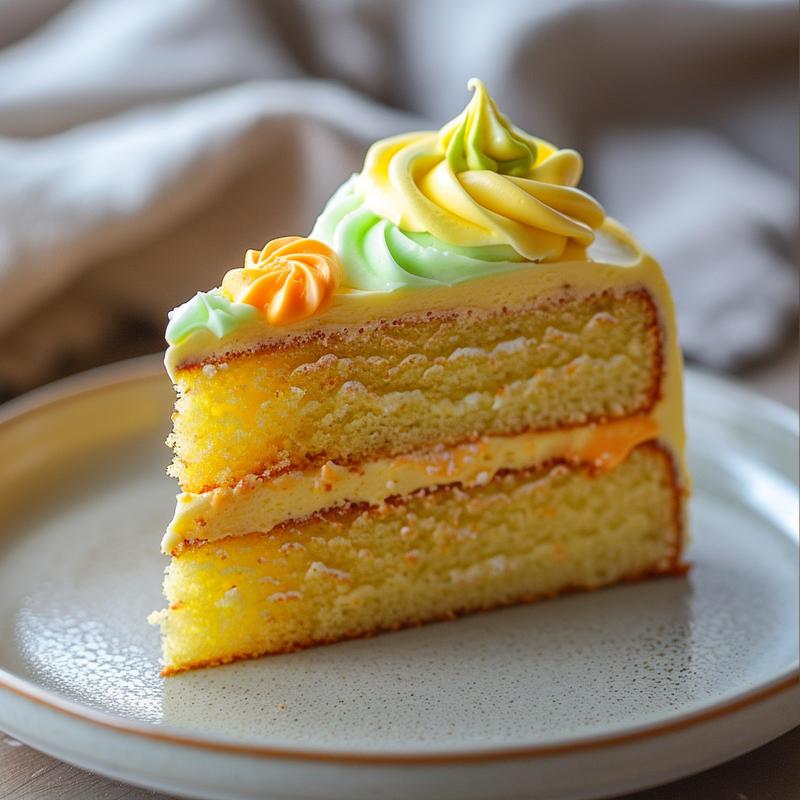
Hey, cake lovers! Louis here, and let me tell you, spring is in the air, and my kitchen is blooming with ideas! If you’re looking to brighten up your next gathering with a cake that’s as cute as it is delicious, you’ve come to the right place. Get ready to learn how to create a sun-kissed cake that’ll have everyone saying, ‘Wow!’ This is more than just a cake; it’s a burst of sunshine on a plate, perfect for birthdays, garden parties, or just because you deserve something beautiful. This delightful project is sure to bring a touch of springtime romance to your table.
Why You’ll Love This Spring Cake Decorating Idea
Seriously, what’s not to love? This cake is all about bringing joy and creativity together. It’s surprisingly easy to make, even if you’re not a pro baker. This charming lovers cake design is perfect to your needs, allowing you to customize it to your preferences. You’ll be amazed at how simple ingredients and a little bit of imagination can transform a plain cake into a stunning centerpiece. It’s also a fantastic way to get creative with colors and textures, making each cake unique. Plus, who can resist a cake that looks like it’s been kissed by the sun?
- Easy to Customize: Change the flavors, colors, and decorations to match your event.
- Impressive Results: Create a professional-looking cake without professional skills.
- Fun for All Ages: A great activity to do with kids or friends.
- Perfect for Spring: Captures the essence of the season with bright colors and floral accents.
Ingredients: Your Palette of Sunshine
Before we dive into the decorating magic, let’s gather our supplies. Here’s what you’ll need to create your sun-kissed masterpiece:
- Baked cake: Any flavor will do, but a round shape works best for the sun design.
- Yellow buttercream frosting: Our base color, like the sun’s golden rays.
- Orange buttercream frosting: For adding depth and warmth to the sun effect.
- White buttercream frosting: To create delicate floral accents.
- Green buttercream frosting: For the grassy base, bringing a touch of nature.
- Piping bags: Essential for precise decorating.
- Star piping tip: To create the sun’s rays with texture and dimension.
- Round piping tip: For piping grass and flower details.
- Small offset spatula: For smoothing the base layer of frosting.
- Yellow sprinkles (optional): For added sparkle and fun.
- Edible sugar flowers (optional): For a more elaborate and elegant design.
Steps: Painting Your Sun-Kissed Cake
Alright, let’s get decorating! Follow these simple steps, and you’ll have a stunning spring cake in no time. Remember, it’s all about having fun and letting your creativity shine!
- Frost the Base: Frost the entire cake with a smooth layer of yellow buttercream. Use your small offset spatula to create a flawless canvas.
- Create the Sun: Using a piping bag fitted with a star tip, pipe a ring of orange buttercream around the top edge of the cake. This creates the outer glow of the sun.
- Layer the Sunshine: Fill in the center of the orange ring with more yellow buttercream stars. This layered effect adds depth and dimension to your sun.
- Add the Grass: Using a piping bag fitted with a round tip and green buttercream, pipe small ‘grass’ tufts around the base of the cake. Think of it as a lush, spring meadow.
- Sprinkle the Flowers: Add small dots of white buttercream between the grass tufts for ‘flowers.’ You can also use different colors for variety. This delightful figurine touch adds charm.
- Sparkle and Shine (Optional): Sprinkle yellow sprinkles on the top of the cake for added sparkle. Who doesn’t love a little extra shimmer?
- Floral Flourish (Optional): Place edible sugar flowers strategically around the cake for a more elaborate design. This is where you can really personalize your cake.
Pro Tips for a Picture-Perfect Cake
Want to take your cake to the next level? Here are some insider tips to ensure your sun-kissed cake is a showstopper:
- Chill Out: Chill your cake before frosting. This helps the frosting adhere better and prevents crumbs from mixing in.
- Smooth Operator: Use a warm offset spatula to smooth out your buttercream for a professional finish.
- Practice Makes Perfect: Practice your piping techniques on parchment paper before decorating the cake.
- Color Coordination: Choose colors that complement each other for a harmonious look.
- Less is More: Don’t overcrowd your cake with decorations. Sometimes, simplicity is key.
Common Mistakes to Avoid
Even the best bakers make mistakes! Here are some common pitfalls to watch out for:
- Overmixing the Buttercream: This can lead to a soupy consistency. Mix until just combined.
- Using Cold Ingredients: Make sure your butter and eggs are at room temperature for a smooth batter.
- Uneven Frosting: Take your time to create a smooth, even base layer of frosting.
- Rushing the Process: Don’t try to decorate a warm cake. Let it cool completely before frosting.
- Ignoring Piping Pressure: Maintain consistent pressure when piping to create even lines and shapes.
Variations: Let Your Creativity Shine
Want to put your own spin on this sun-kissed cake? Here are a few ideas to get you started:
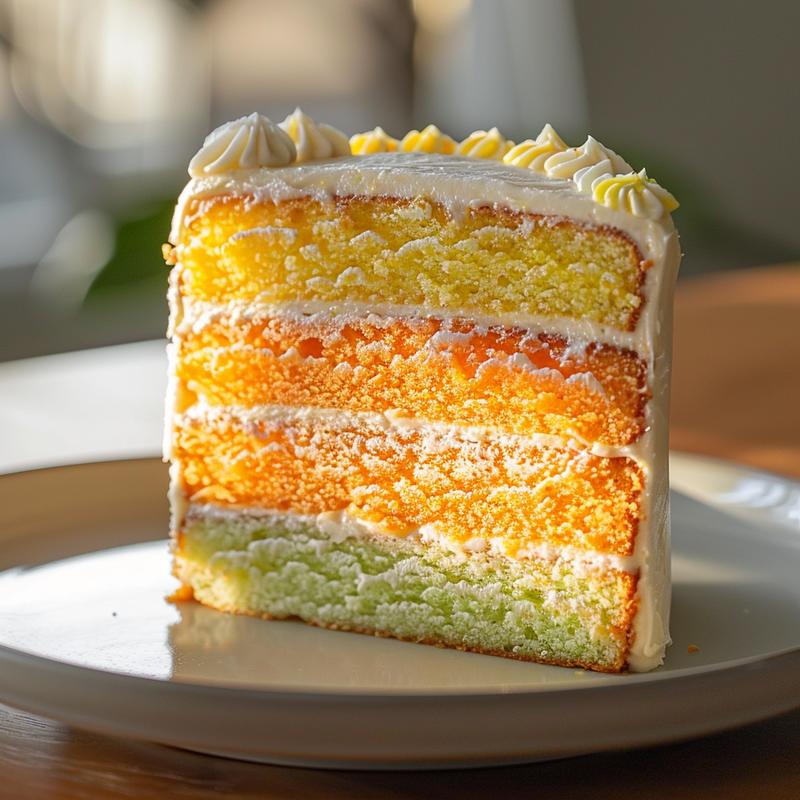
- Flavor Fusion: Experiment with different cake flavors, like lemon, vanilla, or almond.
- Color Palette: Use different shades of yellow, orange, and green to create a unique color scheme.
- Floral Fantasy: Add different types of edible flowers, like pansies, violets, or roses.
- Themed Toppers: Add small figurines or cake toppers to match your event’s theme. Consider a groom statue or lovers bride groom statue for a wedding or anniversary.
- Chocolate Drizzle: Drizzle melted chocolate over the cake for an extra touch of decadence.
Storage: Keeping Your Cake Fresh
To keep your sun-kissed cake fresh and delicious, follow these storage tips:
- Room Temperature: Store the cake at room temperature in an airtight container for up to 2 days.
- Refrigeration: If you need to store it longer, refrigerate it in an airtight container for up to 5 days. Let it come to room temperature before serving.
- Freezing: For longer storage, freeze the cake (unfrosted) for up to 3 months. Wrap it tightly in plastic wrap and aluminum foil.
FAQ: Your Burning Cake Questions Answered
Got questions? I’ve got answers! Here are some frequently asked questions about cake decorating:
- Can I use store-bought frosting? Absolutely! Just make sure it’s a good quality frosting that holds its shape well.
- What if I don’t have piping bags? You can use a Ziploc bag with the corner snipped off as a makeshift piping bag.
- How do I prevent my buttercream from melting? Keep your buttercream in a cool place and avoid overmixing.
- Can I make this cake ahead of time? Yes, you can bake and frost the cake a day or two in advance. Just store it properly.
- Where can I find edible sugar flowers? You can find them at most craft stores or online.
Serving Suggestions: Sharing the Sunshine
Finally, it’s time to share your beautiful creation! Here are some serving suggestions to make your sun-kissed cake even more special:
- Pair with Fresh Fruit: Serve slices of cake with fresh berries or sliced peaches.
- Add a Scoop of Ice Cream: A scoop of vanilla or lemon ice cream complements the cake perfectly.
- Serve with Tea or Coffee: A warm beverage is the perfect accompaniment to a slice of cake.
- Create a Dessert Platter: Arrange slices of cake on a platter with other desserts for a stunning presentation.
- Share with Loved Ones: Most importantly, share your cake with the people you love!
And there you have it! Your very own sun-kissed spring cake, ready to brighten up any occasion. Remember, cake decorating is all about having fun and expressing your creativity. So go ahead, get baking, and let your imagination run wild! Crafted with attention to detail, this cake is sure to impress. Happy baking, and I can’t wait to see your creations! Don’t forget to tag me in your photos! #LouisBakes #SpringCake #SunKissedCake

Springtime Cake Decorating Ideas: Brighten Up Your Gathering with This Adorable Sun-Kiss
Ingredients
Method
- Frost the entire cake with a smooth layer of yellow buttercream.
- Pipe a ring of orange buttercream around the top edge of the cake to create a 'sun' effect.
- Fill in the center of the orange ring with more yellow buttercream stars.
- Pipe small 'grass' tufts around the base of the cake using green buttercream.
- Add small dots of white buttercream between the grass tufts for 'flowers'.
- Optionally, sprinkle yellow sprinkles on the top of the cake.
- Place edible sugar flowers strategically around the cake.
Notes
Loved this recipe? Save it to your favorite Pinterest board so you can easily find it later! ✨