Hey, baking besties! Louis here, and I’m absolutely buzzing to share my latest kitchen creation: Cookie Tulip Fields! These aren’t just cookies; they’re edible art that screams spring. Imagine a vibrant field of tulips, but in cookie form. Seriously, who wouldn’t want a bite of that? This tutorial will show you how to make these incredible treats. I promise, it’s easier than it looks, and the results are guaranteed to wow!
Ready to turn your kitchen into a blooming masterpiece? Let’s get baking!
Why You’ll Love This Recipe
Okay, picture this: you walk into a party with a platter of these Cookie Tulip Fields. Jaws. Will. Drop. But besides the ‘gram-worthy aesthetic, here’s why you’ll absolutely adore this recipe:
- Impressive but Easy: Looks complicated, but it’s totally doable. This tutorial breaks it down step by step, making it manageable even for beginner bakers.
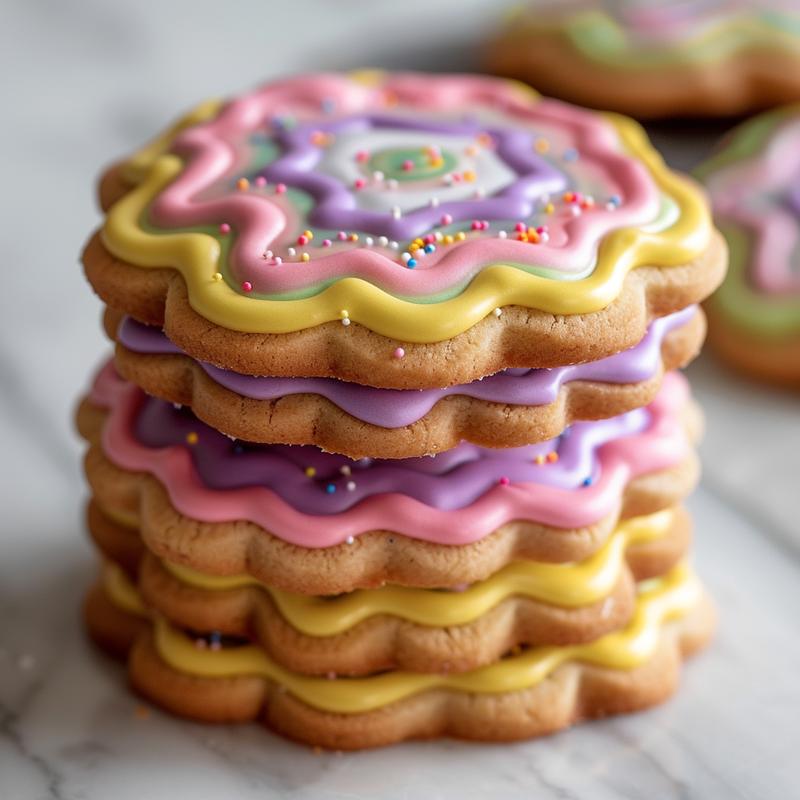
- Customizable Colors: Go wild with your favorite colors! Make it a rainbow tulip field, or stick to pastels – it’s your canvas!
- Perfect for Any Occasion: Easter, spring birthdays, or just a Tuesday pick-me-up – these cookies fit the bill.
- Seriously Delicious: It’s not just about looks; these sugar cookies are melt-in-your-mouth good.
Ingredients: Your Palette of Flavors
Alright, gather your supplies! Here’s what you’ll need to create your Cookie Tulip Fields:
- Sugar cookie dough (pre-made or homemade): The foundation of our floral fantasy. If you’re feeling ambitious, whip up a batch from scratch. If not, store-bought works just fine.
- Royal icing (various colors: red, yellow, pink, purple, green): This is where the magic happens! Gel food coloring is your best friend for achieving vibrant hues.
- Sprinkles (optional): Add a touch of sparkle to your tulips. Edible glitter? Yes, please!
- Piping bags or bottles: Essential for precise icing application. Invest in a good set – they’ll become your go-to tools.
- Cookie sheet: Your baking stage.
- Parchment paper: Prevents sticking and makes cleanup a breeze.
Step-by-Step: From Dough to Dreamy
Let’s get down to business! Follow these steps carefully, and you’ll be on your way to creating your own edible tulip garden.
- Preheat and Prep: Preheat your oven to 350°F (175°C) if you are planning to use homemade cookie dough. Line a cookie sheet with parchment paper. This is a crucial step use to prevent sticking.
- Roll Out and Cut: Roll out your sugar cookie dough (if homemade) to about ¼ inch thickness. Use a tulip-shaped cookie cutter to cut out your cookie shapes. If using pre-made dough, follow the package instructions for baking. It’s important to make the cookies uniform.
- Bake to Perfection: Bake cookies for 8-10 minutes, or until the edges are lightly golden. Let them cool completely on the baking sheet before icing.
- Icing Prep: Prepare your royal icing according to your recipe. Divide it into separate bowls and tint with your desired food coloring. Remember, gel food coloring gives the best results.
- Bag It Up: Transfer each color of icing into a piping bag or bottle. Make sure your bags are properly sealed to prevent leaks.
- Outline and Flood: Outline the tulip cookies with the colored royal icing. Then, flood the inside of the outline with more icing of the same color. Start with the flower part of the tulip. This is where you get to use your artistic flair.
- Sprinkle Magic (Optional): While the icing is still wet, add sprinkles if desired. This adds a fun touch and extra texture.
- Stem and Leaf Time: Use green icing to pipe stems and leaves onto the cookies. Get creative with different leaf shapes and sizes.
- Set and Serve: Let the icing set completely (this may take several hours) before serving or packaging. Patience is key here!
Pro Tips for Tulip Triumph
Want to take your Cookie Tulip Fields to the next level? Here are some insider tips:
- Icing Consistency is Key: You want a consistency that’s thick enough to hold its shape, but thin enough to spread easily. Experiment with adding water, a little at a time, until you achieve the perfect consistency.
- Piping Practice: Practice your piping skills on a piece of parchment paper before decorating the cookies. This will help you get a feel for the pressure and control needed.
- Edible Glue: If you’re adding sprinkles or other decorations after the icing has set, use a tiny dab of corn syrup as edible glue.
- Cookie Diameter: Aim for a cookie diameter approximately 2-3 inches for the best visual impact.
- Fondant Use: While this tutorial focuses on royal icing, you can also use fondant to cut out intricate details for your tulip decorations.
Common Mistakes to Avoid
We all make mistakes, but knowing what to look out for can save you some heartache (and wasted ingredients!):
- Overbaking the Cookies: This will result in dry, crumbly cookies that are hard to decorate. Keep a close eye on them and remove them from the oven as soon as the edges start to brown.
- Icing That’s Too Thin: This will cause the icing to run off the edges of the cookies, creating a messy look.
- Impatience: Don’t rush the drying process! If you try to stack or package the cookies before the icing is completely set, you’ll end up with a smudged mess.
Variations: Let Your Creativity Bloom
The beauty of this recipe is that it’s endlessly customizable! Here are some ideas to get your creative juices flowing:
- Different Flower Shapes: Experiment with other flower shapes, such as roses, daisies, or sunflowers. You can use a heart cutter and modify it into tear drops to make different flower shapes.
- Ombre Icing: Create a stunning ombre effect by gradually blending different shades of the same color.
- Edible Paint: Use edible paint to add intricate details to your tulip designs.
- Cookie Bouquet: Arrange your decorated cookies in a vase or bouquet for a truly impressive presentation.
- Easter Egg-shaped Cookies With Bunnies: Incorporate Easter themes by adding bunny-shaped cookies or decorating the tulips with bunny details.
- Flower Sugar Cookies: Create an entire garden of flower-shaped cookies, each with its unique design and color scheme.
Storage Secrets
Want to keep your Cookie Tulip Fields fresh and delicious? Here’s how:
- Airtight Container: Store the cookies in an airtight container at room temperature.
- Layering: If you’re stacking the cookies, place a sheet of parchment paper between each layer to prevent sticking.
- Avoid Humidity: Keep the cookies away from humidity, as this can cause the icing to soften and become sticky.
FAQ: Your Burning Questions Answered
Got questions? I’ve got answers!
- Can I use store-bought royal icing? Absolutely! Just make sure to adjust the consistency as needed.
- How long do the cookies last? They’ll stay fresh for about 5-7 days if stored properly.
- Can I freeze the cookies? Yes, you can freeze the cookies, but the icing may become slightly soft when thawed.
- Can I make the dough ahead of time? Yes, you can make the dough ahead of time and store it in the refrigerator for up to 3 days.
Serving Suggestions: A Feast for the Eyes and Taste Buds
These Cookie Tulip Fields are delicious on their own, but here are some ways to elevate the experience:
- Tea Party Treat: Serve them with a pot of your favorite tea for a delightful afternoon treat.
- Dessert Platter: Add them to a dessert platter with other spring-themed goodies, such as macarons, mini cupcakes, and fresh fruit.
- Gift Giving: Package them in a cute box or bag and give them as a thoughtful gift to friends, family, or neighbors.
There you have it, my friends! Your guide to creating stunning Cookie Tulip Fields that are sure to impress. Now go forth and bake something beautiful! Don’t forget to tag me in your creations – I can’t wait to see what you come up with! Like I always say, baking should be fun. Remember to roll out the dough evenly, cut out precise shapes, and use your fingers until the icing is just right. Happy baking!


Cookie Tulip Fields
Ingredients
Method
- Preheat oven to 350°F (175°C) if using homemade cookie dough. Line a cookie sheet with parchment paper.
- Roll out sugar cookie dough (if homemade) and cut out tulip shapes using a cookie cutter. If using pre-made dough, follow package instructions for baking.
- Bake cookies for 8-10 minutes, or until edges are lightly golden. Let cool completely on the baking sheet.
- Prepare royal icing in various colors. Divide icing into separate bowls and tint with food coloring.
- Transfer each color of icing into a piping bag or bottle.
- Outline and flood the tulip cookies with the colored royal icing. Start with the flower part of the tulip.
- While the icing is still wet, add sprinkles if desired.
- Use green icing to pipe stems and leaves onto the cookies.
- Let the icing set completely (this may take several hours) before serving or packaging.
Notes
Loved this recipe? Save it to your favorite Pinterest board so you can easily find it later! ✨