

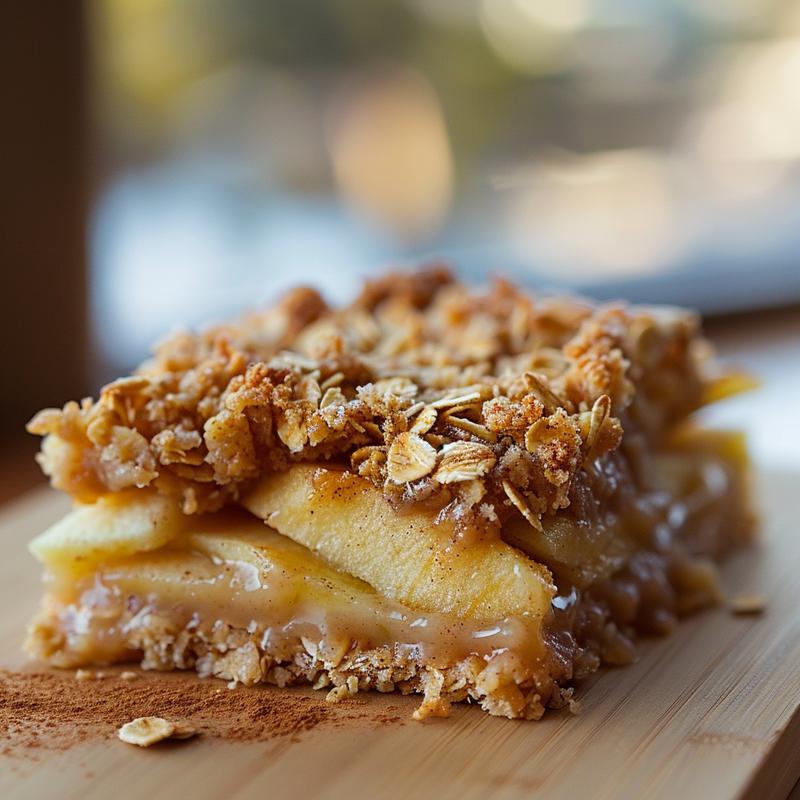
Discover the Ultimate Old-Fashioned Apple Crisp Recipe
If you’re craving a dessert that takes you back to simpler times, look no further than this old-fashioned apple crisp. Perfectly balanced between sweet and tart, this recipe showcases the incredible flavors of fresh apples combined with a crunchy oat topping. Whether you’re hosting a family gathering or just want a comforting weeknight treat, this dish is sure to please. Ready to create a dessert that’s not just delicious but also Instagram-worthy? Let’s dive in!
Why You’ll Love This Recipe
Here are five irresistible reasons to whip up this classic dessert:
- Simple Ingredients: Made with pantry staples, you can create this dessert without a trip to the grocery store.
- Perfect for Any Occasion: Whether it’s a cozy night in or a festive family gathering, this apple crisp fits right in.
- Customizable: Feel free to tweak the ingredients to match your taste or dietary needs.
- Delicious Leftovers: This dessert tastes even better the next day, making it a great make-ahead option!
- Serve It Up: Top it with a scoop of vanilla ice cream for an indulgent treat that everyone will rave about!
Ingredients: What You’ll Need
To create the best old-fashioned apple crisp, gather the following ingredients:
- 4 cups sliced apples: A mix of sweet and tart varieties like Granny Smith and Honeycrisp is recommended.
- 1 tablespoon lemon juice: Prevents browning and adds a zesty kick to the apple filling.
- 1/2 cup brown sugar: Adds depth and sweetness to the filling.
- 1 cup rolled oats: Essential for the crispy topping, providing a delightful texture.
- 1 cup all-purpose flour: Forms the base of the topping.
- 1 teaspoon ground cinnamon: Infuses the dish with warm flavors.
- 1/2 cup unsalted butter: For richness and to bind the topping together.
- 1/4 teaspoon salt: Enhances all the flavors in the dish.
Step-by-Step Instructions
Follow these simple steps to create your apple crisp:
- Preheat the oven: Set it to 350°F (175°C) so it’s hot and ready.
- Prepare the apples: In a large bowl, toss the sliced apples with lemon juice, brown sugar, and half the cinnamon.
- Make the topping: In another bowl, combine rolled oats, flour, remaining cinnamon, salt, and melted butter until crumbly.
- Assemble: Spread the apple mixture evenly in a greased baking dish, then sprinkle the topping over the apples.
- Bake: Place in the oven for 30-35 minutes, until the topping is golden brown and the apples are tender.
- Cool and serve: Allow it to cool slightly before serving, and don’t forget that scoop of vanilla ice cream!
Expert Tips for the Perfect Crisp
Want to take your apple crisp to the next level? Keep these pro tips in mind:
- Mix your apples: A blend of sweet and tart apples creates a more complex flavor.
- Let it rest: Allowing the crisp to cool for a few minutes helps the filling set, making it easier to serve.
- Oat substitutions: For a gluten-free version, use certified gluten-free oats.
- Experiment with spices: Add a pinch of nutmeg or ginger for a twist on the classic flavor.
- Make it dairy-free: Substitute coconut oil for butter and use a dairy-free ice cream.
Avoiding Common Mistakes
Here are some common pitfalls and how to avoid them:
- Apples too mushy: Avoid over-baking! Keep an eye on it and test for doneness.
- Uneven topping: Ensure the topping is spread evenly for consistent crispiness.
- Too sweet or too bland: Adjust the sugar according to the sweetness of your apples.
Delicious Variations to Try
Feeling adventurous? Here are some fun variations on the classic apple crisp:
- Berry Twist: Add a cup of fresh or frozen berries for a fruity twist.
- Nutty Crunch: Incorporate chopped nuts like pecans or walnuts into the topping for added texture.
- Maple Flavor: Swap some of the brown sugar for maple syrup in the filling for a rich flavor.
- Caramel Delight: Drizzle caramel sauce on top before serving for an indulgent treat.
Storage and Make-Ahead Instructions
This apple crisp can be made ahead of time:
- Storing leftovers: Keep in an airtight container in the fridge for up to 3 days.
- Reheating: Warm in the oven at 350°F (175°C) for about 10-15 minutes before serving.
- Freezing: You can freeze the unbaked crisp for up to 3 months. Just bake from frozen, adding a few extra minutes to the baking time.
FAQs About Old-Fashioned Apple Crisp
Got questions? We’ve got answers!
- What apples are best for apple crisp? A mix of sweet and tart apples, such as Granny Smith and Honeycrisp, works best.
- Can I make this recipe vegan? Yes! Substitute butter with coconut oil and use a flax egg instead of a regular egg.
- How do I know when the crisp is done? Look for a golden-brown topping and tender apples; a toothpick should come out clean.
- Can I add other fruits? Absolutely! Pears and berries are great additions.
- Is it necessary to peel the apples? While it’s not necessary, peeling them will create a smoother texture.
- Can I use quick oats instead of rolled oats? Yes, but the texture will be slightly different; rolled oats provide a chewier bite.
- How can I enhance the flavor? Adding spices like nutmeg or ginger can elevate the overall flavor profile.
- What is the best way to serve apple crisp? Serve warm with a scoop of vanilla ice cream or whipped cream on top!
Nutrition Tips and Dietary Adaptations
This recipe can be adapted for various dietary needs:
- For a lower sugar option: Reduce the sugar in the filling and topping.
- For gluten-free: Use gluten-free flour and oats.
- For a dairy-free version: Substitute with plant-based butter and milk alternatives.
Essential Equipment
Before you start baking, make sure you have the right tools:
- Mixing bowls: For combining your ingredients.
- Baking dish: A 9×13 inch dish works perfectly for this recipe.
- Measuring cups and spoons: Precision is key in baking!
- Spatula: For mixing and spreading the topping evenly.
Serving Suggestions
Elevate your apple crisp experience with these serving ideas:
- Classic: Serve warm with a scoop of vanilla ice cream on top.
- Drizzle: A drizzle of caramel sauce adds a sweet touch.
- With nuts: Top with chopped nuts for an added crunch.
- Breakfast twist: Enjoy it for breakfast with a dollop of yogurt!
Now that you have all the tips, tricks, and variations at your fingertips, it’s time to get into the kitchen and make this old-fashioned apple crisp. Every bite is a delightful reminder of why this recipe has stood the test of time. Happy baking!

Old-Fashioned Apple Crisp Recipe: Easy Dessert with Oats and Cinnamon
Ingredients
Method
- Preheat oven to 350°F (175°C).
- Mix dry ingredients in a bowl.
- Whisk wet ingredients in another bowl.
- Combine wet and dry, then pour into a greased dish.
- Bake for 25-30 minutes, then cool before serving.
Notes
Loved this recipe? Save it to your favorite Pinterest board so you can easily find it later! ✨
